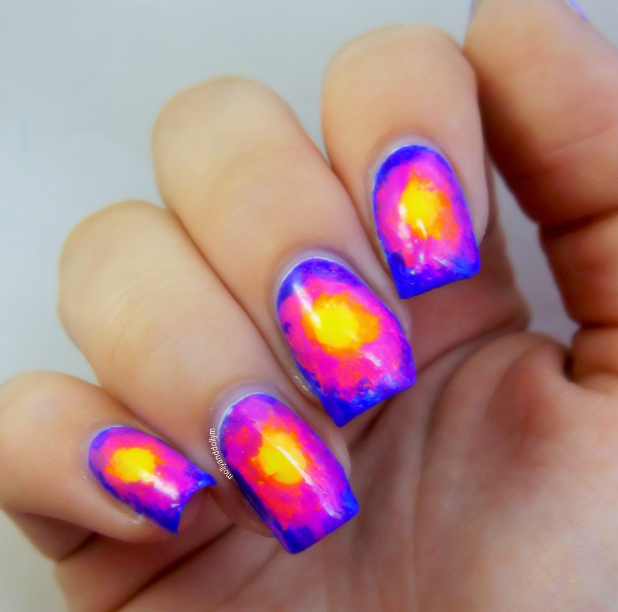
Neon Circle Gradient | Nail Art
Sunday, June 21, 2015
Hi! Today I have another summer nail design. A circle gradient is a perfect alternative to the typical horizontal or vertical ombre design. It take a few more steps but the end result is worth it!
This design can be quite challenging, particularly for the new nail artist. I tried this design using the typical gradient method, painting colours onto a sponge and pressing it over the nail. I created a small circle of yellow, then bordered the circle with the other colours. This method did not work! It created a huge mess on the nail, all the colours mixed together, it wasn't pretty.
Instead of giving up, I thought of another method to get this look on the nail. I took a makeup sponge, and cut it into tiny pieces. Then, I painted each sponge with the different colours. Using tweezers, pick up the first sponge, in my case yellow, and create a small dot in the centre of the nail. After that, pick up the next colour, and dab the sponge around the centre dot. Repeat this process for all the colours, and you should end up with a circle gradient. Go back in with your colours as you see fit, and then you're done!
This design is perfect for a summer night party! I love the combination of bold colours.
I hope you found inspiration from this design!
Polishes used -
China Glaze - Orange Knockout
China Glaze - Thistle Do Nicely
Models Own - Purple Bandana
Ciate - Yellow Taxi
Barry M - Blue Grape
Base Coat - OPI - Nail Envy (soft and thin)
Top Coat - Essence Split Sealer
Tools used -
Makeup sponges
Molly x


0 comments:
Post a Comment